As the way users expect to interact with a website or web application changes, the methods websites use to communicate with the web browser must keep up. Always ahead of the curve, our favorite WordPress hosting provider WP Engine has partnered with Cloudflare to build a new network that improves the speed, scalability and security of your website.
While the new Advanced Network is free to existing WP Engine customers, it does require a few steps to enable.
- Step 1: Planning a DNS Records Change
- Step 2: Update WP Engine Network Settings
- Step 3: Pointing DNS Records
What is changing?
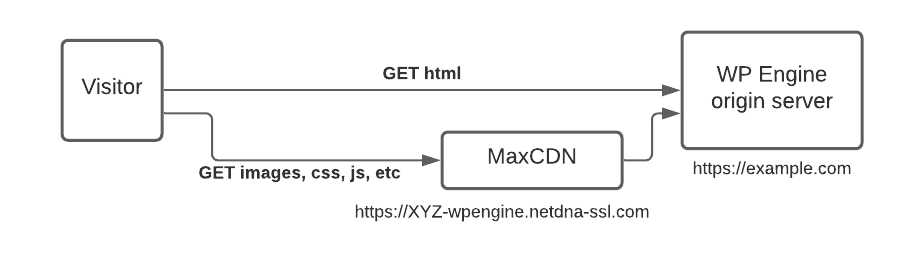
Traditionally, when a web browser requests a URL from a webserver, the computer running the web browser would talk directly to the computer that served the website URL (which is known as the webserver). As the web evolved, Content Delivery Networks (CDN) were developed to decrease the time between a browser requesting a resource and that resource being provided by the webserver. By placing the webserver behind a CDN, static resources that are frequently requested can be cached “near” the end users on the physical network, speeding up delivery time and lessening the load on the webserver.
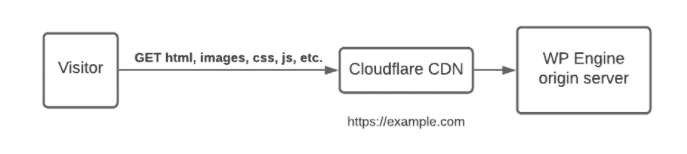
The WP Engine Advanced Network takes this one step further by intelligently caching all requests to a web server, even HTML, thereby placing all content on a URL as close as possible on the physical network to the end user.
Before:
After:
While the new network delivery model is the highlight of the new Advanced Network, it’s certainly not the only advantage. Check out WP Engine’s network comparison guide for even more improvements. And, if you’re interested in the technology behind the Advanced Network, we recommend starting with WP Engine’s blog post titled “HTTP/3: the past, the present, and the future.”
How do I move to the Advanced Network at WP Engine?
Moving your WordPress website to the WP Engine Advanced Network is not very difficult, but it does require some understanding of Domain Name Service (DNS), how the DNS for your website is configured, and how long your DNS records cache on the public network.
Step 1: Planning a DNS Records Change
Think of modifications to your DNS like submitting a change of address form to the US Postal Service. Once you’ve mailed in the form, there’s no going back. If your initial change of address request was filled out incorrectly, you can issue a new request, but you know that the original request will remain out there, causing trouble for some time. If you are going to make a DNS record change, make certain that you know what you are doing—mistakes can take weeks to rectify.
Before making a change to your DNS records, run through the process of making the change to ensure that you have access to everything you need. If you don’t know who provides DNS services for your website’s domain, run a WHOIS lookup on your domain using the ICANN registration data lookup tool. The “Nameserver” records in the search results will identify your DNS provider.
Step 2: Update WP Engine Network Settings
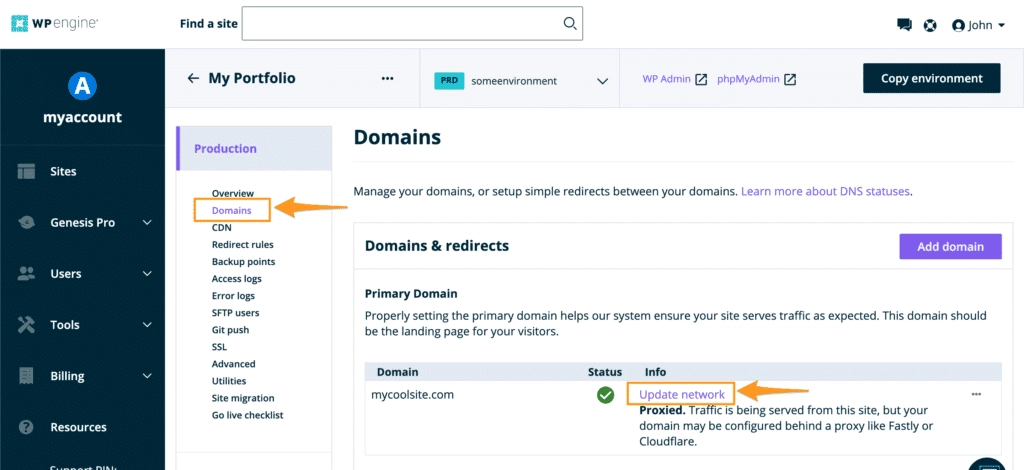
Log in to the WP Engine dashboard at https://my.wpengine.com/. If you’re not sure what your password is, use the forgot password function to reset your login credentials. Once logged in, click into the website you want to upgrade.
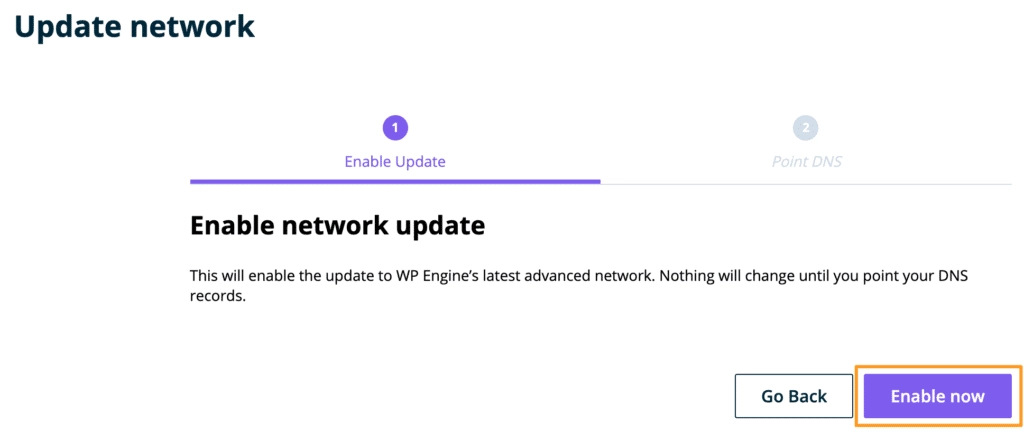
On the site overview page, click into “Domains.” For each domain listed, click the “Upgrade network” link and proceed through the upgrade wizard. This step must be performed for each domain listed before modifying the associated DNS records.
Step 3: Pointing DNS Records
Depending upon how your DNS service provider is configured, there are two different DNS configurations you can utilize: Point by CNAME or Point by IP.
The WP Engine Advanced Network uses the same CNAME and IP addresses across all WP Engine hosted websites:
- CNAME: wp.wpenginepowered.com
- IPs: 141.193.213.10 and 141.193.213.11
If you’re utilizing a Cloudflare account to point your DNS, you must use the DNS-only proxy mode, which simply requires turning your orange cloud to grey.
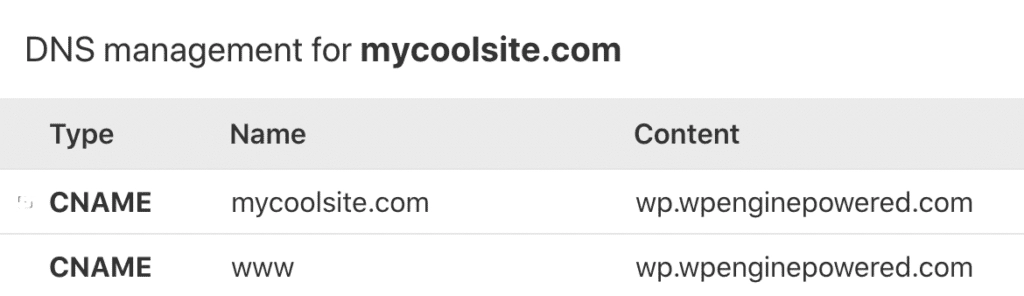
Point by CNAME
Update your existing DNS records for both the WWW and the root domain (@) to be CNAME records that point at wp.wpenginepowered.com. While a single platform CNAME is in contrast to the standard DNS configuration (where each environment has a different CNAME), it is still considered best practice to point DNS using CNAME flattening, rather than with A records.
Example:
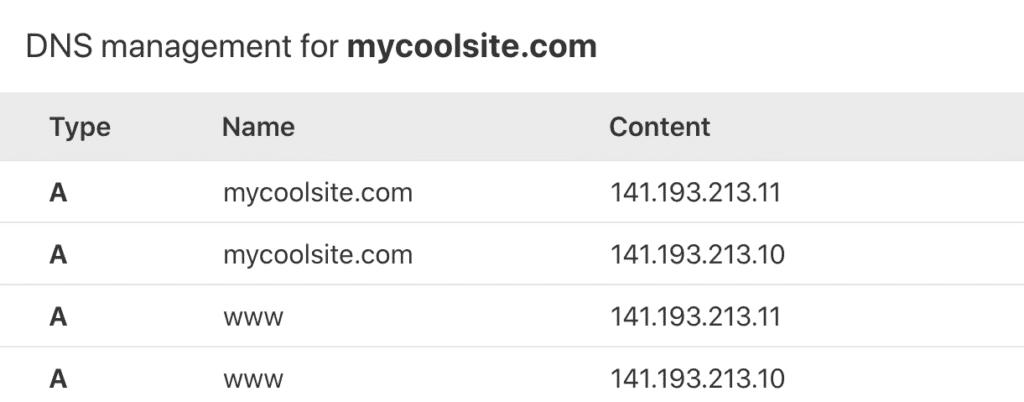
Point by IP
If your DNS provider does not support CNAME flattening, the Advanced Network has two A records available, 141.193.213.10 and 141.193.213.11. Update your existing DNS records for both the WWW and the root domain (@) to be A records that point at 141.193.213.10 and 141.193.213.11.
Example:
Learn more at https://wpengine.com/support/advanced-network/.
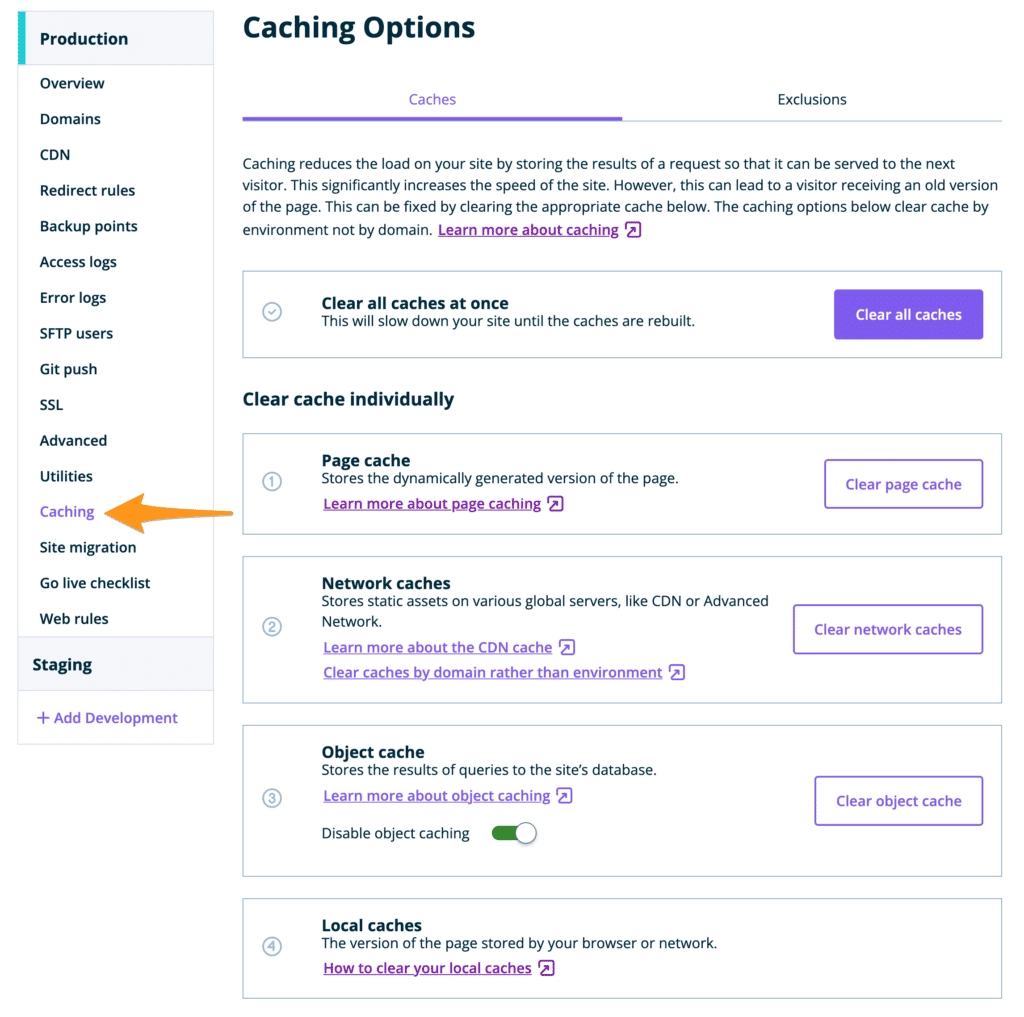
After you have upgraded to the WP Engine Advanced Network, you will notice a performance improvement after the first page load. You will also note that caching of your site is much more aggressive and will require more frequent manual clearing of the WP Engine cache.